 ARCORA ROBINETS
How Do You Install a Wall Mounted Tap Without Hiring a Plumber?
Vues:0 ClassificationInstall
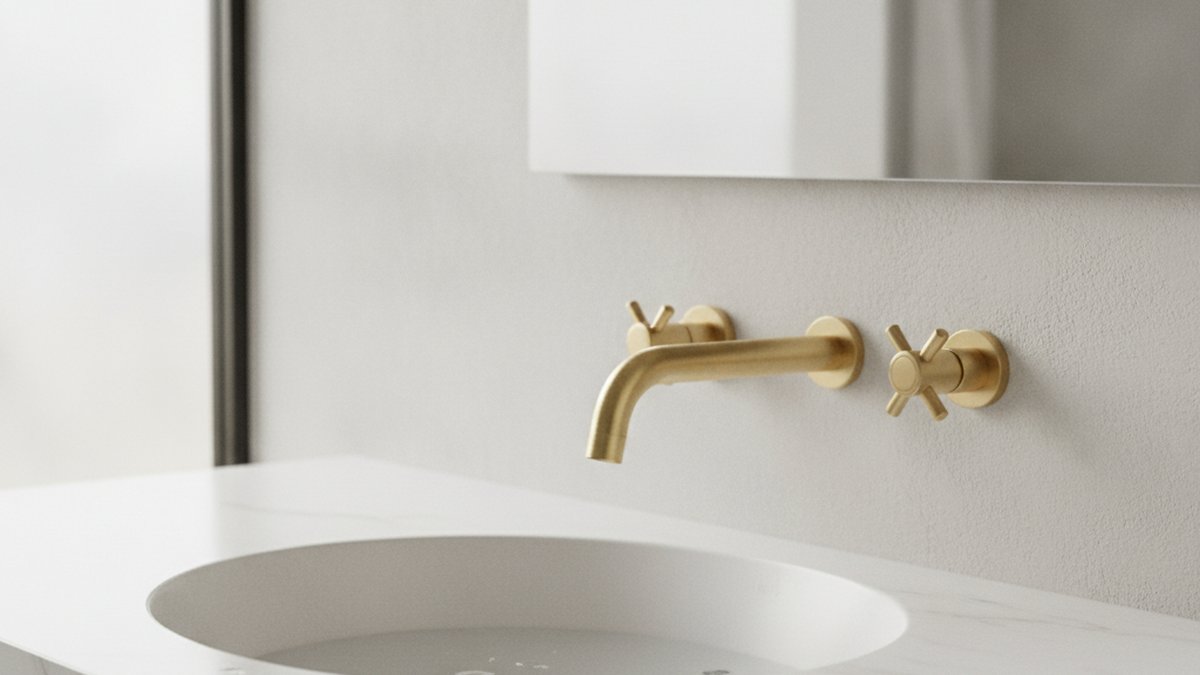
Learning how to install wall mounted tap hardware is really two jobs in one: the rough-in plumbing that hides inside the wall, and the trim that you see afterward. Most people who get frustrated aren’t bad at DIY — they just tried to bolt on the finished spout before the concealed valve body was set at the right depth, and by then the wall was already tiled. Get the sequence right and a wall mounted tap is one of the cleaner, more satisfying upgrades you can make to a bathroom or kitchen sink.
Below, I’ll walk through the exact order of operations, the tools and rough-in depth numbers that matter, the mistakes that cause callbacks, and how a wall mounted setup differs from a standard deck-mounted faucet you’d screw straight into the sink.
What exactly is a wall mounted tap, and how is it different from a deck-mounted faucet?
A wall mounted tap is a faucet whose spout and handles come out of the wall instead of being mounted on the sink deck or countertop. The working valve — the part that actually turns the water on and controls temperature — is a concealed « rough-in » body buried inside the wall. What you see afterward (the spout, handles, and cover plates called escutcheons) is just the trim.
That’s the key mental shift. On a normal deck faucet, the whole thing is one unit you drop into holes in the sink. On a wall mounted tap, the plumbing lives in the wall and the pretty part is added last. This is why wall mounted taps look so clean — there’s nothing cluttering the counter, and cleaning behind the faucet is trivial.
| Feature | Wall Mounted Tap | Deck-Mounted Faucet |
|---|---|---|
| Where it mounts | Into the finished wall above the basin | Into holes in the sink or countertop |
| Valve location | Concealed rough-in body inside the wall | Under the sink, easy to reach |
| Best installed | During a remodel, before wall is closed | Anytime — swaps in minutes |
| Countertop clutter | None — counter stays clear | Faucet sits on the deck |
| DIY difficulty (trim only) | Easy | Easy |
| DIY difficulty (full rough-in) | Moderate — needs planning + testing | Easy |
| Repair access | Through the trim plate/access panel | Under-sink |
If you’re deciding between styles for a bathroom, our guide on whether a wall mount faucet Grohe-style setup is right for your bathroom walks through the aesthetic and plumbing trade-offs in more detail. For bar and prep sinks, the same principles apply to a bar faucet wall mount setup that actually fits.
What tools and parts do I need to install a wall mounted tap?
You need a modest plumber’s toolkit plus the tap’s own rough-in kit. Here’s the short answer, then the details.
- Adjustable wrench and a set of open-end wrenches — for tightening supply connections and compression fittings.
- Basin/faucet wrench or a deep socket — for reaching valve nuts in tight wall cavities.
- PTFE (Teflon) thread-seal tape — for any threaded (NPT) male fittings.
- A tubing cutter — if you’re running copper or PEX to the valve body.
- Level and tape measure — the single most important tools for a wall tap; crooked handles are the #1 cosmetic complaint.
- The manufacturer’s rough-in valve body — usually sold with, or matched to, the trim kit. Buy them as a matched pair from the same brand.
- Escutcheon plates and mounting hardware — included with the trim.
- Silicone sealant — to seal the escutcheons against the finished wall.
One part that trips people up is the connection between your home’s supply lines and the valve body. Wall mounted valve bodies typically use ½-inch NPT or a sweat/press copper inlet, and your supply stubs need to match. If you’re unsure what you’re threading into what, read our breakdown of which faucet supply line thread type you actually need so you don’t end up with a cross-threaded, slow-weeping leak behind a finished wall — the worst place to have one.
What’s the correct rough-in depth, and why does it matter so much?
The rough-in depth is the distance from the valve body’s mounting surface to the finished face of the wall, and it has to fall inside the range printed in your tap’s instructions — usually somewhere between about ⅝ inch and 2⅝ inches (roughly 16–66 mm), depending on the brand. Get this wrong and the trim either won’t reach the wall or the handles won’t seat — and by then the tile is on.
Here’s the thing everyone learns the hard way: you set the valve body before you know exactly how thick the finished wall will be. So you have to account for the drywall or cement board plus the tile and thinset that goes on top. If you’re adding ½-inch backer board and ⅜-inch tile with thinset, that’s roughly an inch of buildup your valve depth has to anticipate.
Most quality rough-in valves include a plastic plaster guard (a temporary cover) marked with min/max depth lines. Do this:
- Dry-fit the valve body between the studs at the height you want the spout and handles.
- Measure from the valve’s reference surface out to where the finished tile face will land.
- Confirm that number sits between the min and max lines on the plaster guard.
- Adjust the valve’s position (most bodies mount to an adjustable bracket) until it’s dead-on, then secure it.
- Leave the plaster guard in place to protect the valve during drywall, tile, and grout work.
For spout height, a common bathroom standard is placing the spout so it clears the basin rim by 4–6 inches, with the handles set at a comfortable, level line on either side. Always dry-fit the trim against a scrap of your actual tile to confirm before you commit.
How do I actually connect the water and install the tap, step by step?
Short answer: mount and depth-set the valve body, connect hot and cold supplies, pressure-test with the plaster guard on before closing the wall, then install the trim after tiling. Here’s the full sequence.
Step 1 — Shut off the water and plan the layout
Turn off the water at the main or the branch stops feeding that room. Open a lower faucet to drain pressure. Mark stud positions and your target spout/handle heights on the framing. Confirm hot is on the left, cold on the right (from the user’s perspective facing the wall).
Step 2 — Mount the valve body at the correct depth
Secure the concealed valve to a cross-brace or the manufacturer’s bracket between studs. Use your level. Then re-check the rough-in depth against the plaster guard one more time — measure twice here, because you cannot fix it later without opening the wall.
Step 3 — Connect the hot and cold supplies
Run your supply lines (copper, PEX, or via threaded stubs) to the valve inlets, respecting hot-left/cold-right. On threaded NPT connections, wrap PTFE tape clockwise 3–4 times and tighten firmly without over-torquing — brass fittings crack if you gorilla them. If your valve has a spout outlet drop and a shower outlet, cap or plumb them per the diagram. Understanding your brass faucet socket and how it seats helps here, because a poorly seated socket is a slow-leak waiting to happen inside a wall.
Step 4 — Pressure-test BEFORE you close the wall
This is the step DIYers skip and regret. Turn the water back on with the plaster guard/test cap in place and inspect every joint for weeping — leave it pressurized for at least 15–30 minutes and wipe each fitting with a dry paper towel to catch even a pinhole seep. Fixing a leak now costs five minutes; fixing it after tiling costs a demolished wall.
Step 5 — Close and finish the wall
Once you’re leak-free, install drywall/backer board, then tile and grout, cutting neat openings around the valve stems and spout nipple. Let everything cure.
Step 6 — Install the trim
Remove the plaster guard. Slide on the escutcheon plates with a bead of silicone against the wall, thread on the spout, and attach the handles — checking with a level that they’re symmetric. Turn the water on and test hot, cold, and full flow. Wipe away excess silicone.
If you’re doing a full shower-and-sink combination, the same « rough-in first, trim last » logic applies, and our walkthrough on how to install a shower faucet set without opening the wall shows how to handle it when the wall’s already finished.
Can I install a wall mounted tap without opening the wall — and what’s the real cost?
Sometimes, yes — but only if there’s existing access. If your plumbing is already stubbed out from a previous wall-mount tap, or you have an access panel behind the wall (from an adjacent closet, for example), you can swap or install trim without demolition. If the wall is finished and there’s no existing rough-in, you’ll need to open it — there’s no honest way around running new supply lines to the valve location.
On cost: doing the trim-only portion yourself saves the most money, since that’s the easy part. The rough-in is where a pro earns their fee if you’re not comfortable soldering copper or making watertight PEX/threaded connections behind a wall. A realistic DIY budget for a mid-range wall mounted tap plus rough-in valve and fittings runs from a modest amount for the parts, versus a plumber’s labor on top if you hire out the concealed work. My honest advice: if you’ve never pressure-tested a concealed joint, do the rough-in with a plumber (or at least have them inspect before you tile), then do the trim yourself.
What are the most common mistakes when installing a wall mounted tap?
The big four are wrong rough-in depth, skipping the pressure test, reversed hot/cold, and un-level handles. Every one is preventable.
- Wrong depth: the trim won’t seat or the handles bottom out. Always measure to the finished tile face, not the bare stud or drywall.
- No pressure test: a hidden weep destroys the wall over weeks. Test before you close up, every time.
- Hot and cold reversed: annoying and code-noncompliant. Confirm orientation at the valve, not just at the handles.
- Crooked trim: use a level at every stage; a wall tap has nowhere to hide asymmetry.
- Over-tightening brass: cracks the fitting and creates the exact leak you were trying to avoid.
- Mismatched brands: a rough-in valve from one maker often won’t accept another maker’s trim. Buy matched sets.
What should I look for when buying a wall mounted tap and valve?
Buy the rough-in valve and trim as a matched set from a reputable brand, confirm the rough-in depth range fits your wall build, and check that the finish is a solid corrosion-resistant coating (PVD is best for longevity). A ceramic-disc cartridge inside the valve will outlast rubber-washer designs by years and drip far less.
Check the flow rate too — many regions cap bathroom faucets at 1.2 GPM and kitchens around 1.8 GPM. Look for compliance markings and a solid brass valve body rather than plastic. And read the warranty: quality faucet brands back their finishes and cartridges for years, sometimes a lifetime, which tells you they expect it to last.
FAQ
Do I need special plumbing for a wall mounted tap?
You need the water supply lines run up into the wall to a concealed valve body, rather than up through the floor or cabinet to under the sink. It’s not exotic plumbing, but it does have to be roughed into the wall before the wall is finished. If the lines aren’t already there, the wall has to be opened to run them.
How high above the sink should a wall mounted tap be?
Set the spout so it clears the basin rim by about 4–6 inches, which gives comfortable hand and cup clearance without excessive splashing. Center the spout over the drain, and set the handles level on either side. Always dry-fit against your actual basin before committing the rough-in height.
Can I replace an existing wall mounted tap myself?
Yes — if you’re swapping trim onto an existing, compatible valve body, it’s a straightforward job: shut off the water, remove the old handles, spout, and escutcheons, and fit the new ones. The catch is compatibility. Trim usually only fits the same brand’s valve, so confirm before you buy.
Why is my new wall mounted tap dripping or leaking?
A drip from the spout after install usually means a cartridge that isn’t seated or debris caught under the ceramic disc — shut off, pull the cartridge, and check. A leak behind the wall points to a supply-joint problem, which is exactly why the pre-tile pressure test matters. If it’s weeping at a threaded fitting, you likely need more PTFE tape or a re-seat rather than more force.
Is a wall mounted tap harder to fix than a regular faucet?
The trim (handles, cartridge, spout) is just as easy to service as a deck faucet — you work from the front through the escutcheon. The concealed valve body is harder to reach, which is why buying a quality valve with a serviceable ceramic cartridge upfront pays off; you’ll rarely need to touch the body itself.
What’s the biggest mistake beginners make?
Setting the rough-in valve at the wrong depth and skipping the pressure test. Both are invisible until the wall is finished, and both are expensive to fix afterward. Measure to the finished tile face, and test every joint under pressure before you close the wall.
Author note & brand credibility
Written by the arcorarobinet fixtures team. At arcorarobinet (www.arcorarobinet.com), we design and pressure-test faucets and wall mounted tap systems to industry flow-rate and durability standards, and our valve bodies use ceramic-disc cartridges rated for hundreds of thousands of cycles. Every trim kit is matched to its rough-in valve and backed by our finish and cartridge warranty, so what you install today keeps working — and stays leak-free behind the wall — for years. This guide reflects hands-on installation experience, not just spec sheets.



您好!Veuillez vous connecter