 ARCORA ROBINETS
How Do You Replace a Kitchen Faucet Filter the Right Way (Without Flooding the Cabinet)?
Vues:0 ClassificationInstall
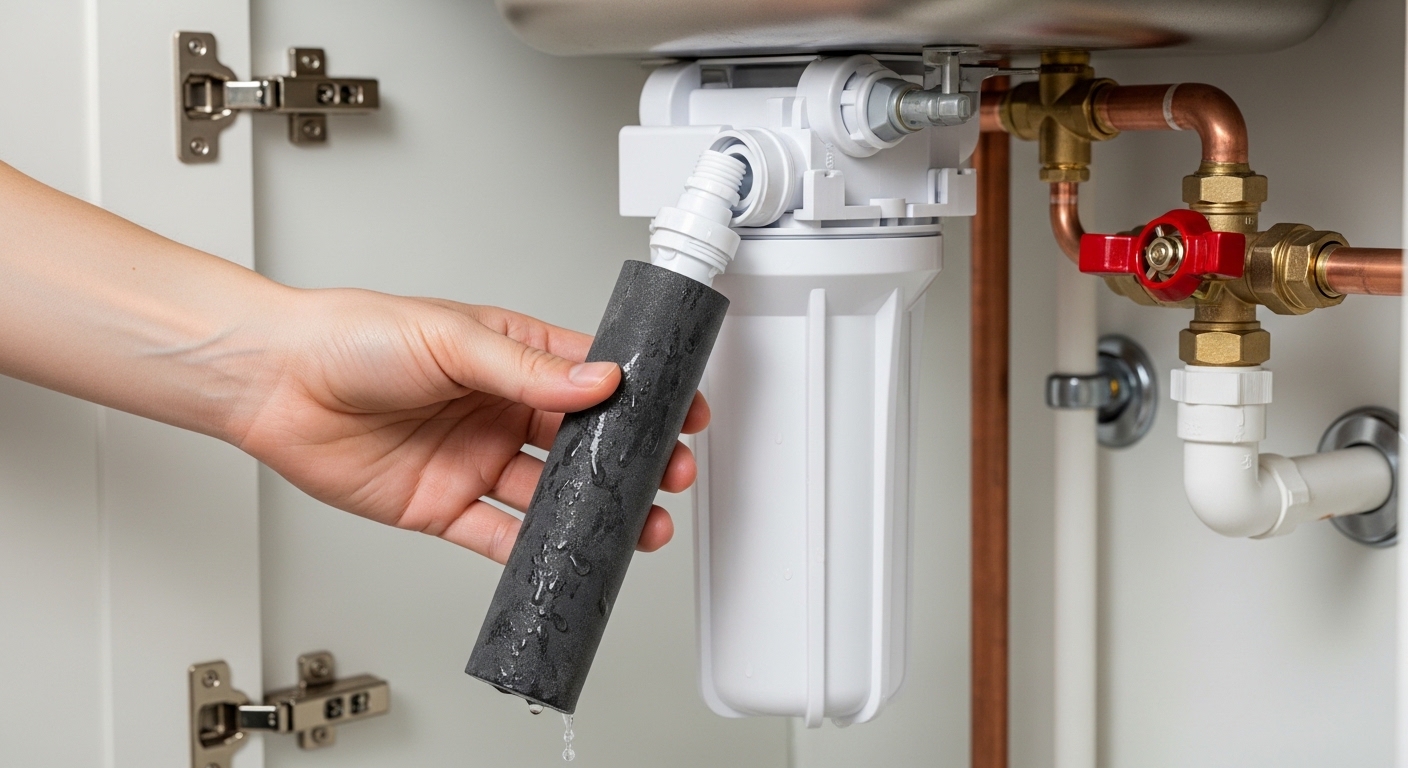
Knowing how to replace a kitchen faucet filter is one of those small skills that quietly saves you money, protects your faucet’s valve, and keeps your water tasting the way it should. Whether you have a filter built into the faucet head, an inline carbon filter under the sink, or a full reverse-osmosis system feeding a dedicated drinking-water tap, the core idea is the same: a worn-out filter media stops adsorbing contaminants and starts restricting flow. The good news is that for the vast majority of home setups, swapping the cartridge is a hand-tight, tool-free job you can finish before your coffee gets cold.
Below, we’ll walk through exactly how to identify your filter type, when to change it, the step-by-step swap for each kind, and the small mistakes that turn a 10-minute job into a wet cabinet and a service call.
How do I know which type of kitchen faucet filter I actually have?
Before you buy a replacement, figure out which of three common systems you own — because the cartridge, the orientation, and the shut-off step are different for each. Look under your sink and at your faucet head; one of these three will match.
| Filter type | Where it lives | Typical lifespan | Tools needed | Rough cost per cartridge |
|---|---|---|---|---|
| Faucet-head / pull-down spray filter | Screwed into the spray head or aerator | 2–3 months | None or a wrench for the aerator | $8–$20 |
| Inline / under-sink carbon filter | A canister on the cold supply line under the sink | 6–12 months | None (twist housings) or a filter wrench | $15–$45 |
| Reverse-osmosis (RO) multi-stage system | 3–5 canisters feeding a dedicated drinking tap | Pre/carbon: 6–12 mo; RO membrane: 2–3 yrs | Filter housing wrench | $20–$70 per stage |
If you have a small countertop or pull-out filter that screws onto the spout tip, that’s a faucet-end filter — and it’s worth reading our deep dive on the water tap end filter if you’re choosing or replacing one of those, because thread sizes and flow ratings vary more than people expect. If you have several canisters and a separate little faucet just for drinking water, you have an RO system, and the replacement sequence matters a lot more.
How often should I replace my kitchen faucet filter?
Replace most carbon faucet filters every 2–6 months, and RO membranes every 2–3 years — but go by gallons and taste, not just the calendar. Manufacturers rate cartridges in gallons (for example, 100, 200, or 500 gallons) because the carbon’s capacity to adsorb chlorine, lead, and sediment is finite. A household of four running a faucet-mounted filter heavily can exhaust a 100-gallon cartridge in well under three months.
Watch for these real-world signs it’s time, regardless of the date on the box:
- Flow has dropped noticeably — a clogged filter chokes pressure long before it stops working chemically.
- Taste or smell has returned — if chlorine or a « flat » taste comes back, the carbon is spent.
- The change-indicator light or color strip on faucet-mounted units has tripped.
- You’re past the rated gallons — check the sticker; many units have a small dial or counter.
- Visible sediment or discoloration in clear inline housings.
One important note: a filter that has gone way past its rating doesn’t just stop helping — it can become a breeding ground for bacteria and can dump trapped sediment back into your water. When in doubt, change it. Cartridges are cheap; your faucet’s ceramic valve and your gut are not.
How do you replace a faucet-mounted or pull-down spray filter step by step?
For a faucet-head filter, you usually just unscrew the old cartridge or filter housing by hand, snap or twist in the new one, and flush — no water shut-off required because you’re working downstream of the valve. Here’s the clean sequence:
- Turn the faucet off and switch the filter unit to « unfiltered/bypass » mode if it has that lever.
- Unscrew the filter cartridge. Most twist a quarter- to half-turn counterclockwise and pull free. If it’s an aerator-style filter, you may need a cloth-wrapped wrench to break it loose without scratching the finish.
- Check the O-ring or gasket. This is the step people skip. If the rubber seal looks flattened, cracked, or hard, replace it now — a $2 O-ring prevents a slow drip later.
- Insert the new cartridge in the same orientation, lining up any arrow or tab. Hand-tighten only. Over-torquing cracks plastic threads.
- Flush the carbon. Run cold water through the new filter for 5–10 minutes (or per the gallons the maker specifies). You’ll see gray carbon fines clear out — this is normal and is why you don’t drink the first glass.
While you’ve got the spray head off, it’s the perfect moment to descale it. Mineral buildup on the screen mimics a clogged filter, and our guide on how to clean a faucet head covers the vinegar-soak method that real users swear by. If your flow is still weak after a fresh filter, the aerator — not the cartridge — is often the culprit.
How do you change an under-sink inline or RO filter without flooding the cabinet?
For inline and RO filters, you must shut off the cold-water supply and relieve the pressure first — this is the step that separates a tidy swap from a soaked cabinet. Unlike a faucet-head filter, these sit on the pressurized supply line, so opening a housing under pressure means an instant spray.
Here’s the safe sequence for an under-sink canister:
- Shut the supply. Turn the cold-water shut-off valve (or the system’s own inlet valve) fully clockwise. For RO systems, also close the tank valve.
- Relieve the pressure. Open the filtered-water faucet and let it run until it stops — this drains the line so the housing won’t spray.
- Place a towel and a shallow pan under the housing. Even a drained canister holds a cup or two of water.
- Unscrew the housing — twist-style by hand, or use the plastic filter wrench that came with the system for sump-style canisters. Lefty-loosey, but support the canister so it doesn’t drop.
- Remove the old cartridge, clean the housing with a little dish soap and water, and inspect the large O-ring on the rim.
- Lubricate the O-ring lightly with food-grade silicone grease, seat it in its groove, drop in the new cartridge, and hand-tighten the housing (wrench only the final snug-up).
- Restore water slowly. Crack the supply valve open gradually and watch the seam for drips. Then flush the system per the maker’s gallons before drinking.
That O-ring is the single most common leak point on the entire system. If you’ve ever dealt with a slow weep on a reverse-osmosis tap, you know exactly why we wrote a full walkthrough on RO faucet O-ring replacement — a flattened or pinched seal is behind most « my new filter is leaking » complaints.
Why is my new kitchen faucet filter leaking or giving weak flow?
A new filter leaks almost always because the O-ring is pinched, dry, or missing — and it gives weak flow either because air is still in the line, the cartridge is in backward, or you forgot the flush step. Diagnose it in this order before you assume the part is defective:
| Symptom after replacement | Most likely cause | Fix |
|---|---|---|
| Drip from the housing seam | O-ring pinched, dry, or not seated | Reseat and lightly grease the O-ring; hand-tighten evenly |
| Drip from the faucet/tap base | Loose connection or worn tap O-ring | Snug fittings; replace tap O-ring if needed |
| Weak or sputtering flow | Trapped air or unflushed carbon | Run water 5–10 min to purge air and fines |
| No flow at all | Supply valve still closed or cartridge backward | Open valve fully; check cartridge arrow direction |
| Cloudy water that clears | Normal air micro-bubbles after a swap | Let it run; clears in a day or two |
If the leak is coming from somewhere other than the filter housing — say, a puddle forming at the back of the cabinet — the filter may be innocent. A failing supply-line connection or faucet base seal can show up right after you’ve been working under there. Our breakdown of why a kitchen faucet leaks underneath the sink will help you tell a filter-housing drip apart from a supply-line or faucet-body leak, so you fix the actual source instead of chasing the symptom.
Can I use a generic replacement filter, or do I need the brand-name cartridge?
You can usually use a quality third-party cartridge as long as it matches your system’s size, micron rating, and certification — but check two things first: physical fit and certification. A cartridge that’s a millimeter too tall won’t let the housing seal, and an uncertified one may not actually remove what you think it does.
Here’s how to choose a replacement you can trust:
- Match the dimensions exactly. Standard sump cartridges are often 10″ or 20″; faucet-head cartridges are proprietary far more often, so measure or read the model number.
- Match or exceed the micron rating. A 0.5-micron carbon block filters finer than a 5-micron sediment filter — don’t downgrade.
- Look for NSF/ANSI certification. NSF/ANSI 42 covers taste and chlorine; NSF/ANSI 53 covers health contaminants like lead and cysts; NSF/ANSI 58 covers RO systems. The claim on the box should name the standard.
- Don’t mix media types blindly. If your system expects a sediment pre-filter in stage one, putting a carbon block there shortens its life dramatically.
For RO systems especially, sticking with the manufacturer’s cartridges (or a clearly compatible certified equivalent) is the safer bet, because stage compatibility and flow balance are engineered together. For simple inline carbon filters, certified universal cartridges are usually fine and cost less.
What’s the easiest filter setup if I hate maintenance?
If low maintenance is the goal, a twist-and-lock faucet-mounted filter or a single-stage inline carbon filter with quick-change cartridges beats a multi-stage RO system on convenience every time. RO produces the purest water but has the most cartridges to track and the slowest fill rate. A quick-change inline filter — where the whole sealed cartridge twists off without opening a wet housing — is the sweet spot for most families: one tool-free swap, twice a year, no O-ring fiddling.
Think about it in terms of how much fuss you’ll actually tolerate. A faucet-head unit is the cheapest and simplest but needs changing most often. A quick-change inline is set-and-forget for 6–12 months. RO is for households that want maximum purity and don’t mind a 20-minute, multi-canister change a few times a year. Pick the one that matches your patience, not the one with the most marketing on the box — the best filter is the one you’ll actually replace on time.
FAQ
Do I need to turn off the water to replace a kitchen faucet filter?
It depends on the filter type. For a faucet-mounted or spout-end filter, no — you’re working downstream of the valve, so just turn the tap off. For any under-sink inline or RO filter, yes — shut the cold supply, then open the filtered tap to relieve pressure before opening the housing, or you’ll get sprayed.
How long should I flush a new kitchen faucet filter before drinking?
Run cold water through a new carbon filter for 5–10 minutes, or until the water runs clear of gray carbon fines. For RO membranes, flush longer — often 1–2 full tank fill-and-drain cycles — because the membrane and storage tank both need to clear. Always follow the gallons or minutes the manufacturer prints on the cartridge.
Why does my water taste worse right after changing the filter?
That’s almost always unflushed carbon dust or trapped air, not a bad cartridge. Fresh carbon sheds fine black particles and can give a temporary « dusty » taste for the first few minutes. Run the water until it’s clear and the taste settles. If a metallic or off taste persists after a full flush, double-check the cartridge is the right type and seated correctly.
Can a clogged filter damage my kitchen faucet?
Indirectly, yes. A heavily clogged filter raises back-pressure and restricts flow, which makes the faucet work harder and can mask early signs of valve or supply problems. It can also harbor bacteria and release trapped sediment into your water. Replacing on schedule protects both your water quality and the faucet’s internal components, including the cartridge valve.
How much does it cost to replace a kitchen faucet filter myself?
For DIY, expect roughly $8–$20 for a faucet-head cartridge, $15–$45 for an inline carbon cartridge, and $20–$70 per stage for RO filters. Compared with bottled water or a plumber’s service call, doing it yourself pays for itself in the first couple of changes — and most swaps take 5–15 minutes with no special tools.
Is it normal for the filter housing to be hard to unscrew?
Yes — under-sink sump housings tighten under pressure and mineral buildup, so they often need the plastic filter wrench that came with the system. Never use a metal pipe wrench, which cracks the plastic. If a faucet-head filter is stuck, wrap a cloth around it for grip and turn gently; if it still won’t budge, soak the threads in warm vinegar to loosen scale.
A note on getting this right
This guide was written by the arcorarobinet product team, drawing on hands-on testing of faucet-mounted, inline, and reverse-osmosis filtration setups across hundreds of customer installations. arcorarobinet designs and supplies kitchen and bathroom fixtures built to recognized plumbing standards, and we recommend choosing replacement filters certified to the relevant NSF/ANSI standard (42, 53, or 58) and following your faucet and filter manufacturer’s warranty and replacement-interval guidance. When a repair touches a pressurized supply line or you’re unsure about a fitting, it’s always worth confirming with a licensed plumber — a few minutes of caution protects both your plumbing and your warranty.



您好!Veuillez vous connecter