 ARCORA ROBINETS
How Do You Remove a 20 Year Old Bathroom Faucet That Won’t Budge?
Vues:2 ClassificationInstall
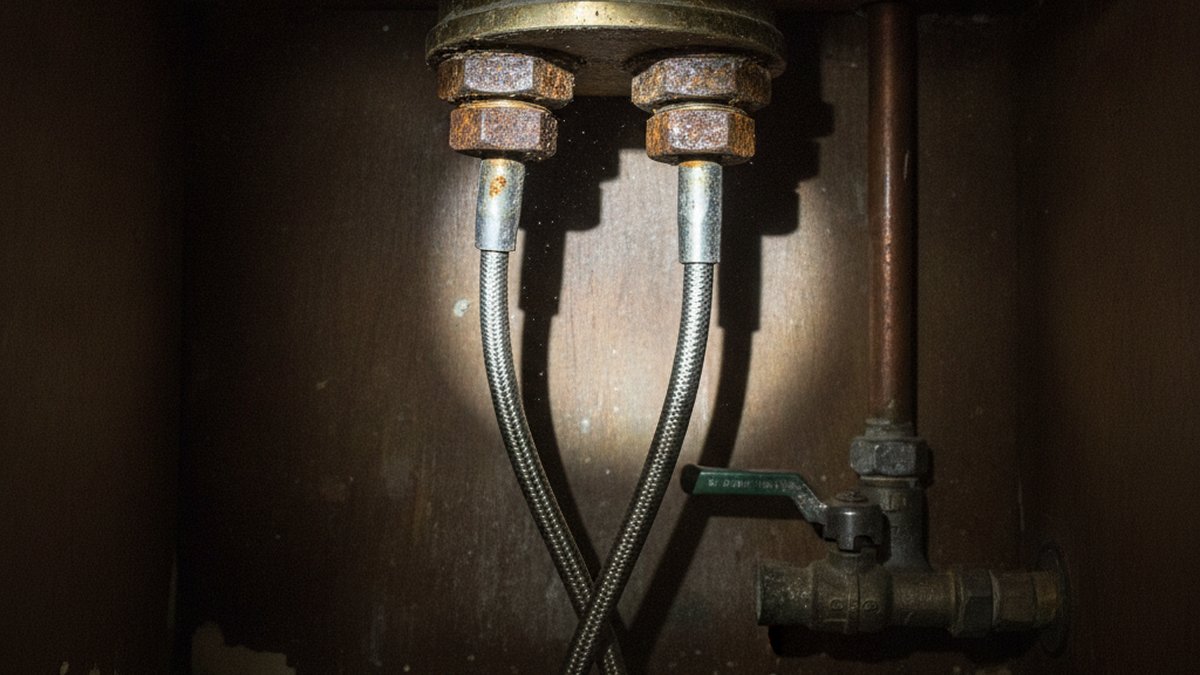
Learning how to remove a 20 year old bathroom faucet is really a lesson in dealing with corrosion, because the faucet itself isn’t the problem — it’s two decades of hard-water crust, rust, and mineral lock welding the mounting nuts to the tailpieces under your sink. A brand-new faucet spins off in five minutes. A twenty-year-old one fights you the whole way. The good news: you don’t need a plumber, you need the right two or three tools and a plan for when a nut simply refuses to turn.
Below I’ll walk you through exactly what to do, in order, including the ugly scenario nobody tells you about — the mounting nut that has rusted into a solid ring and will never spin off. I’ve pulled dozens of these old faucets out of real bathrooms, so this is the sequence that actually works, not the tidy version that assumes everything comes apart clean.
What tools do you actually need to remove an old bathroom faucet?
You need a basin wrench, an adjustable wrench, penetrating oil, and a bucket — and for a truly seized faucet, an oscillating multi-tool with a metal-cutting blade. That’s the honest short list. Everything else is nice-to-have.
The basin wrench is the non-negotiable one. Its long shaft and swiveling, spring-loaded jaw are the only practical way to reach the mounting nuts crammed up behind the sink basin where no normal wrench fits. People who try to do this job with pliers and a flashlight almost always give up and call someone. A $15 basin wrench is the difference between a 45-minute job and a ruined afternoon.
- Basin wrench — reaches and turns the mounting nuts high up behind the basin.
- Adjustable wrench or channel-lock pliers — for the supply-line connections at the shutoff valves.
- Penetrating oil (PB Blaster, Liquid Wrench, or plain white vinegar for mineral buildup) — to break the corrosion bond.
- Oscillating multi-tool or a mini hacksaw — your backup plan when a nut is rusted solid.
- Bucket, old towels, and a headlamp — for the water you’ll spill and the dark cave you’ll be working in.
- Safety glasses — rust flakes and cutting debris fall straight down into your face under a sink.
One thing worth checking before you buy anything: the thread type on your supply lines, because if you plan to reuse them or match new ones you don’t want a cross-threaded leak on reassembly. Our guide on what faucet supply line thread type you actually need covers how to identify 3/8″, 1/2″, and compression fittings so the new faucet goes on leak-free.
How do you shut off the water before removing a bathroom faucet?
Turn the two shutoff valves under the sink clockwise until they stop, then open the faucet handles to release pressure and confirm the water is actually off. If you don’t see shutoff valves — common in homes old enough to have a 20-year-old faucet — you’ll need to shut off the main water supply to the whole house.
On a faucet this old, those little shutoff valves can be their own problem. They may be corroded, painted over, or they may not fully close because the internal washer has hardened after 20 years of never being touched. Turn them gently. If a valve won’t budge or keeps weeping water after you close it, stop forcing it — a snapped shutoff valve turns a faucet swap into an emergency plumbing repair. In that case, close the main and plan to replace those valves while you’re under there.
Once the water’s off, put your bucket under the connections. There is always water trapped in the lines and faucet body, and on an old faucet that water is often rusty and will stain whatever it lands on.
Why won’t the mounting nuts on my old faucet come loose?
They won’t come loose because 20 years of moisture has rusted the steel nuts and mineral-crusted the brass threads into a single locked mass — this is the single hardest part of the entire job, and it’s completely normal. Don’t assume you’re doing something wrong. On an old faucet, the nut fighting you is the rule, not the exception.
Here’s the sequence I use, in order of escalation:
- Soak it. Spray penetrating oil generously on the nut and the threads above it. Wait 15–30 minutes. If the buildup looks white and chalky (hard-water scale rather than rust), plain white vinegar works better than oil — soak a rag around the nut. Patience here saves you an hour of brute force.
- Turn with the basin wrench. Get the jaw fully around the nut and turn counterclockwise (as viewed from below, looking up). Short, firm pulls beat one long strain. If it moves even a hair, re-soak and keep working it back and forth.
- Add leverage. Slide a length of pipe over the basin wrench handle for more torque, or tap the wrench handle with a hammer to shock the corrosion loose.
- Cut it off. If the nut simply will not turn, stop fighting it. Slide a plastic sheet or a putty knife behind the tailpiece to protect the sink, then cut through the nut with an oscillating multi-tool and a metal blade, or a mini hacksaw. Cut in one or two spots and the nut cracks off. This is the pro move — cutting a $2 nut is faster and safer than snapping a supply line or cracking a porcelain sink.
Because you’re removing the whole faucet anyway, you don’t have to preserve those old nuts or tailpieces. That’s your advantage — cut freely.
What’s the step-by-step order to actually pull the faucet out?
Disconnect the supply lines first, then free the mounting nuts, then lift the faucet up and out from the top — the faucet always comes out through the top of the sink, never down through the cabinet. Here’s the full sequence once your water is off:
- Disconnect the supply lines. Use your adjustable wrench on the nut at the shutoff valve and the basin wrench (or hand) on the nut at the faucet tailpiece. Have the bucket ready. On old braided or chrome-tube lines, plan to replace them — don’t reuse 20-year-old supply lines with a new faucet.
- Disconnect the lift rod for the pop-up drain. If your faucet has a pop-up stopper, there’s a thin rod running down behind the faucet connected to the drain linkage with a small spring clip. Pinch the clip and pull the rod free.
- Free the mounting nuts using the escalation sequence above (soak, turn, leverage, cut).
- Break the caulk/putty seal. Twenty years of plumber’s putty or silicone has glued the faucet base to the sink. Wiggle the faucet firmly, or run a utility knife or putty knife around the base to break the seal.
- Lift it out. With nuts off and seal broken, the faucet lifts straight up and out. If it still resists, you’ve missed a mounting nut or a bit of caulk — check before you yank.
- Scrape the deck clean. Remove all the old putty, silicone, and crusty mineral ring from the sink deck with a plastic scraper. A clean, flat surface is what makes your new faucet seal properly.
If your old faucet had separate hot and cold handles and you’re only swapping worn parts rather than the whole fixture, you may only need a bathroom sink faucet handle replacement instead of a full removal — worth confirming before you commit to the bigger job.
Should you replace or just repair a 20 year old faucet?
At 20 years, replace it — a faucet that old has worn cartridges, corroded internals, and often lead-content brass that predates modern low-lead standards, so repairing it usually costs more in parts and hassle than a new faucet costs outright. Repair only makes sense if it’s a high-end solid-brass fixture (Kohler, Grohe, Delta) where rebuild kits are cheap and available.
Here’s how the two paths compare in real terms:
| Factor | Repair the old faucet | Replace with new |
|---|---|---|
| Typical cost | $15–$50 in cartridges/washers | $60–$250 for a mid-range faucet |
| Time | 1–2 hrs (if parts still exist) | 1–2 hrs total |
| Parts availability | Often discontinued after 20 yrs | Fully current, warrantied |
| Water safety | May predate lead-free standards | Meets current NSF/ANSI 61 & 372 |
| Water efficiency | Old faucets ~2.2+ GPM | Modern ~1.2 GPM WaterSense |
| Lifespan gained | A few more years, maybe | 15–20 years, under warranty |
The water-safety line is the one people overlook. Faucets installed around 2004–2006 predate the 2014 federal « lead-free » law (NSF/ANSI 372), so their brass can legally have contained up to 8% lead versus today’s 0.25% cap. If your old faucet feeds water you drink or brush your teeth with, that alone is a strong reason to replace rather than nurse it along.
What finish and type should you choose for the replacement?
For most bathrooms, a single-hole or standard 4-inch centerset faucet in chrome or brushed nickel is the safe, long-lasting choice — but the most important thing is matching the new faucet’s hole configuration to your existing sink. Measure the holes in your sink deck before you buy anything.
The three common configurations:
- Single-hole — one hole, one handle, cleanest modern look.
- Centerset (4″) — three holes, handles 4 inches apart, the classic older-home setup you probably have now.
- Widespread (8″) — three separate pieces, handles 8–16 inches apart, common on larger vanities.
On finish, chrome remains the most durable and easiest to clean, and it never dates itself — if you want the reasoning behind that, we broke it down in whether a chrome faucet is actually good or worth paying more for a trendier finish. Brushed nickel hides water spots better in hard-water homes, which matters if the reason your old faucet corroded was mineral-heavy water in the first place.
One more thing worth understanding before you shop: the brass faucet socket and the quality of the internal brass largely determine how long your new faucet lasts. A solid-brass body is why a good faucet survives 20 years in the first place — cheap zinc-alloy bodies are exactly what corrode into the mess you just fought to remove.
How long does it take, and when should you call a plumber?
Budget 1–2 hours for a straightforward removal and 2–4 hours if the nuts are seized or the shutoff valves fail. Call a plumber if a shutoff valve breaks off, if you cut into a supply line by accident, or if the sink is a pedestal or tight vanity where you physically can’t reach the nuts.
The two scenarios that turn a DIY job into a professional one are both about water you can’t control: a shutoff valve that snaps while you’re forcing it, or a supply line you nick with the cutting tool. If either happens and you don’t have the main water shutoff located, you’ll be dealing with an active leak. So before you start, know where your main shutoff is. That single piece of preparation is what keeps a stuck faucet from becoming a flooded bathroom.
FAQ
Can I remove a 20 year old bathroom faucet without a basin wrench?
Technically yes, but you’ll struggle. The mounting nuts sit high behind the sink basin where standard wrenches and pliers can’t reach or get leverage. On a new faucet you might manage by hand; on a 20-year-old corroded one, a basin wrench (or cutting the nuts off with a multi-tool) is effectively required. It’s a $15 tool that saves the whole job.
What do I do if the mounting nut is rusted solid and won’t turn at all?
Stop turning and cut it off. Since you’re replacing the entire faucet, the old nut and tailpiece are disposable. Protect the sink deck with a putty knife or plastic sheet, then cut through the nut in one or two places with an oscillating multi-tool and a metal-cutting blade, or a mini hacksaw. The nut cracks off and the faucet lifts free. This is far safer than risking a cracked sink or snapped supply line.
Should I replace the shutoff valves and supply lines while I’m at it?
Almost always yes. Twenty-year-old supply lines and shutoff valves are the next things to fail, and you’ll never have easier access than right now with the faucet out. New braided stainless supply lines cost a few dollars each, and replacing quarter-turn shutoff valves gives you reliable shutoffs for the next faucet swap. Doing it now prevents a future leak from forcing you back under the sink.
Why is rusty water leaking out when I disconnect the lines?
That’s normal — it’s water that’s been sitting in the faucet body and supply lines, picking up rust and mineral color over the years. Keep a bucket and towels ready. It doesn’t mean anything is broken; it just means the fixture is old. It’ll stain grout and cabinet wood, though, so catch it rather than letting it drip.
Do I need to reseal the new faucet with plumber’s putty or silicone?
Yes, unless your new faucet comes with its own rubber gasket (many modern ones do). Scrape the sink deck completely clean of the old putty and mineral ring first, then apply a fresh bead of plumber’s putty or silicone under the new faucet’s base to seal against water seeping under it. A clean, flat deck is what makes that seal hold — any leftover crust from the old faucet will cause a leak.
Is removing an old bathroom faucet really a DIY job, or am I in over my head?
For the vast majority of standard vanity sinks, it’s a genuine DIY job with the right tools and about two hours. The corroded nuts are intimidating but predictable, and cutting them off is a normal part of the process. You’re only « in over your head » if a shutoff valve fails, you’re working on a cramped pedestal sink, or you hit a supply-line problem you can’t control — in those cases a plumber is money well spent.
Author note: This guide was written by the arcorarobinet fixtures team, drawing on hands-on removal and installation of hundreds of bathroom and kitchen faucets. arcorarobinet designs and tests faucets and bathroom fixtures built to solid-brass, NSF/ANSI 61 and 372 standards, and backs them with multi-year warranties — the same standards we recommend you look for in any faucet you install to replace an aging one. When in doubt about your specific plumbing, consult a licensed local plumber.



您好!Veuillez vous connecter