 ARCORA ROBINETS
Why Does My Gooseneck Faucet Have Low Water Pressure, and How Do I Fix It?
Vues:3 ClassificationRepair
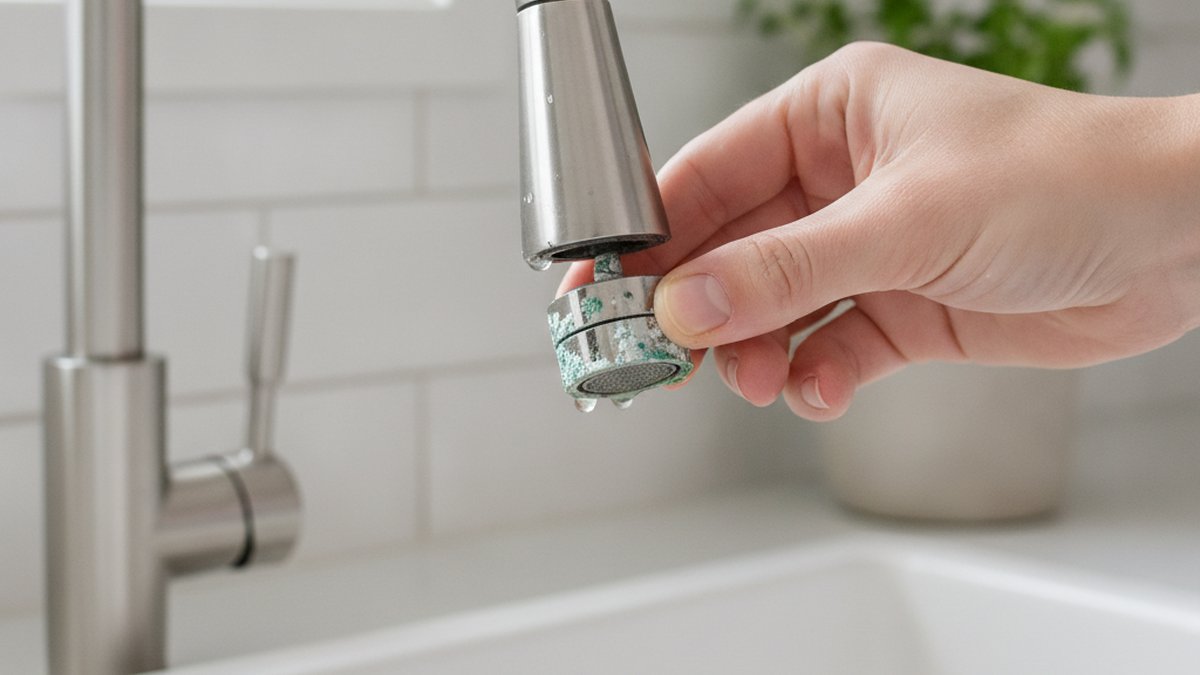
If you’re dealing with gooseneck faucet low water pressure, start at the tip of the spout and work backward: unscrew the aerator, check the two shut-off valves under the sink, then inspect the supply lines and the spray head. This front-to-back order matters because the cheapest, most common culprit sits right at the end of the faucet, and there’s no reason to tear apart your plumbing before you’ve ruled it out. Below, I’ll walk you through every cause in the order a plumber actually checks them, what each fix costs, and when it’s genuinely time to replace the faucet instead of repairing it.
Gooseneck faucets — that tall, curved, high-arc silhouette you see on most modern kitchen sinks — are especially prone to feeling weak because of how they’re built. The water has to climb a tall arc, and many of them use a pull-down sprayer with a diverter and a long internal hose. Every one of those extra parts is a place where flow can drop. The good news: nearly all of them are DIY-fixable in under 30 minutes.
What’s the #1 cause of low pressure on a gooseneck faucet?
A clogged aerator is the number one cause, full stop. The aerator is the small screw-on screen at the very tip of your spout, and it traps sediment, rust flakes, and hard-water mineral scale (calcium and magnesium). Over months that debris builds into a crust that chokes the flow to a trickle — and because it’s the last thing the water passes through, it mimics « whole-house low pressure » perfectly.
Here’s the fast test: unscrew the aerator by hand (righty-tighty from your view means turn it toward you to loosen), then turn the faucet on. If the water suddenly gushes out strong, the aerator was your problem — 100% confirmed. Rinse the screen, soak it in white vinegar for 30 minutes to dissolve scale, scrub with an old toothbrush, and reinstall. If it’s cracked or corroded, a replacement runs $5–$12.
One important gooseneck-specific note: pull-down models don’t have a traditional screw-on aerator on the outside. Their aerator is a small insert seated inside the spray head, often behind a rubber nozzle face. You either pop it out with a plastic aerator key (included with many faucets) or descale the whole spray face by rubber-banding a vinegar-filled bag around it overnight.
How do I clean a hard-water clogged aerator without breaking it?
Soak, don’t scrape. Never dig at the mesh with a screwdriver or metal pick — you’ll tear the screen and ruin the flow pattern. Instead:
- Cover the drain with a rag so no small parts disappear.
- Unscrew the aerator by hand; if it’s stuck, wrap it in a cloth and use pliers gently so you don’t scar the finish.
- Disassemble the stack, noting the order of the screen, rubber washer, and flow restrictor.
- Soak all parts in warm white vinegar for 30–60 minutes.
- Scrub with a soft toothbrush, rinse, reassemble in the same order, and hand-tighten only.
If you have severe hard water and this becomes a monthly chore, that’s your water telling you something. It’s the same mineral problem that quietly kills flow across your whole home, and it’s worth understanding how much water your faucet should actually be delivering — our guide on what kitchen faucet aerator flow rate you actually need explains the GPM numbers so you know whether your « low » pressure is a clog or just a low-flow restrictor doing its job.
Why is only my gooseneck faucet weak when the rest of the house is fine?
If every other tap in the house has strong flow and only your gooseneck faucet is weak, the problem is 100% local to that faucet — not your home’s water supply. That narrows it to four things: the aerator (above), the shut-off valves under the sink, the supply lines, or, on pull-down models, the diverter and spray head.
The most overlooked of these is the angle stop — the small shut-off valve where the supply line meets the pipe under your sink. There are usually two, one hot and one cold. If someone did work under the sink (a disposal install, a filter, a leak repair) and didn’t reopen the valve all the way, you’ll get chronic low pressure. Reach under, find both oval or football-shaped handles, and turn each fully counterclockwise. A half-open valve is a shockingly common cause that costs nothing to fix.
Check hot and cold separately, too. Run only hot, then only cold. If just one side is weak, you’ve isolated the problem to that side’s valve or supply line — the aerator affects both equally, so a one-sided weakness points upstream.
Could a kinked or clogged supply line be the problem?
Yes — and it’s the second thing to check after the valves. Braided stainless supply lines can kink internally where the rubber core collapses, especially if the faucet was installed in a tight cabinet and the line was bent sharply. The braid looks fine outside while the inside is pinched shut.
To check, shut off both valves, disconnect the supply line at the faucet end into a bucket, and briefly crack the valve open. Strong flow into the bucket means the line and valve upstream are fine and your restriction is inside the faucet. Weak flow means the line or valve is the culprit. Supply lines are cheap ($8–$15) and worth replacing on sight if they’re over 8–10 years old. Just match the connection correctly — getting the thread wrong causes leaks, and our breakdown of the faucet supply line thread type you actually need will keep you from cross-threading a fitting.
Why does my pull-down gooseneck sprayer have weak or split flow?
On a pull-down gooseneck, weak or sputtering flow when you pull the spray head out usually means the diverter is stuck or the spray head itself is clogged. The diverter is a small valve inside the faucet body that redirects water from the spout to the sprayer. When it gums up with sediment, it doesn’t fully open, and you get a weak, half-hearted spray even though the regular stream seems okay.
The gooseneck design adds a second suspect: the long pull-down hose. Inside that hose is a quick-connect fitting and sometimes a weighted counterbalance. If the hose is kinked, twisted around the counterweight, or the quick-connect isn’t fully seated, flow drops. Pull the hose fully out from below and check that it moves freely and isn’t wrapped around anything.
To clean the spray head, descale it in vinegar like the aerator. To reach the diverter, you’ll typically pull the spray head off the hose (a quick-connect twist), then access the diverter in the faucet body per your model’s manual. Diverters are inexpensive replacement parts, often $10–$20. If your issue is specifically a drip or leak from the sprayer rather than pure pressure, that’s a related but different repair — see why your kitchen faucet sprayer is leaking and how to fix it.
Diagnose it fast: causes, fixes, and cost at a glance
Here’s the whole troubleshooting map in one place. Work top to bottom — the causes are ordered by how common and how cheap they are to fix.
| Cause | Telltale sign | Fix | Cost / Time |
|---|---|---|---|
| Clogged aerator | Flow surges when aerator removed | Soak in vinegar or replace | $0–$12 / 5–30 min |
| Partly closed shut-off valve | Weak after recent under-sink work | Open valve fully (counterclockwise) | $0 / 2 min |
| Kinked / old supply line | Weak flow into bucket test | Replace braided supply line | $8–$15 / 15 min |
| Stuck pull-down diverter | Stream ok, spray weak | Clean or replace diverter | $10–$20 / 20–40 min |
| Clogged spray head | Split or sputtering spray pattern | Descale spray face in vinegar | $0 / overnight soak |
| Clogged cartridge | One temp weak, or both after years | Replace cartridge | $15–$40 / 30–45 min |
| Whole-house low pressure | Every fixture is weak | Check PRV / call utility | Varies |
What if I’ve cleaned everything and pressure is still low?
If the aerator, valves, supply lines, and spray head are all clear and you still have weak flow, the cartridge inside the faucet is the next suspect. The cartridge controls flow and temperature mixing, and mineral buildup or a worn seal inside it will strangle the water. A telltale clue: if hot and cold are both weak even straight from the valves, and everything downstream is clean, the cartridge is likely restricting flow.
Replacing a cartridge is a moderate DIY job — shut off the water, pull the handle, remove the retaining clip or nut, extract the old cartridge, and drop in the exact replacement for your model. Buy the OEM part for your specific faucet; a « universal » cartridge often fits poorly. If you’re not comfortable, this is a reasonable point to call a plumber, since forcing a corroded cartridge can crack the faucet body.
And if the « weak everywhere » answer is that every fixture in the house is low, then the faucet was never the problem. Check your pressure-reducing valve (PRV) near the main line, or test with a $10 hose-bib pressure gauge — normal residential pressure is 45–60 psi. Below 40 psi across the whole house is a supply-side issue for your utility or a plumber, not a faucet repair.
When should I just replace the gooseneck faucet instead of repairing it?
Replace it when the faucet body itself is corroded, when parts are discontinued, or when you’re spending more than about half the price of a new faucet on repairs. A quality gooseneck faucet runs $80–$250, so if a cartridge, diverter, and supply lines together are creeping past $60–$70 on a 12-year-old faucet with a pitted finish, a new one is the smarter money.
Other clear replace-it signals:
- The base is loose and leaking even after re-tightening the mounting nut — the internal seals are shot.
- You can’t find the cartridge or diverter for your model anymore.
- The finish is flaking or corroding, which means the underlying brass or zinc is degrading.
- Low pressure returns within weeks of every cleaning — the internal passages are scaled beyond rescue.
When you do shop, look for a solid brass body, a ceramic-disc cartridge (far more durable than rubber-seal designs), and a flow rate that fits your needs — most kitchen faucets are 1.5–1.8 GPM. A higher-arc gooseneck gives you clearance for big pots but can feel airier at the same pressure, so don’t confuse « tall spout » with « weak faucet. »
A quick word on prevention
The single best thing you can do to prevent gooseneck faucet low water pressure from coming back is to clean the aerator and spray head on a schedule — every 3 months if you have hard water, every 6–12 months if you don’t. It takes five minutes and stops the slow scale creep before it becomes a trickle. If your whole home runs hard, a softener or an inline filter protects every fixture, not just this one.
Also treat your under-sink valves gently. Exercising them once a year (fully closing and reopening) keeps them from seizing, so they’ll actually work the day you need to shut the water off in a hurry.
FAQ
Can a new gooseneck faucet already have low water pressure out of the box?
Yes, and it’s usually one of two things: the flow restrictor in the aerator (a legitimate water-saving part, not a defect) or debris flushed into the aerator during installation. Before you assume a defect, remove the aerator and run the faucet to clear construction debris from the lines, then reinstall. If it’s still weak, the restrictor may simply be limiting flow to code — check the rated GPM.
Does a gooseneck (high-arc) design itself reduce water pressure?
No. The height of the arc doesn’t meaningfully reduce pressure at household scale — the difference of climbing a taller spout is negligible. A gooseneck can feel less forceful because the water falls from higher and the stream spreads, but true pressure loss comes from clogs, valves, diverters, or the cartridge, not the curve.
Why is my hot water weak but cold is strong (or vice versa)?
A one-sided weakness points to that side’s shut-off valve or supply line, or to the water heater side if it’s hot. Because the aerator restricts both temperatures equally, unequal flow rules the aerator out and sends you upstream. Check that side’s angle stop first, then its supply line, then the cartridge.
How often should I clean my gooseneck faucet aerator?
Every 3 months in hard-water areas, every 6–12 months in soft-water areas. If you notice the stream getting weaker or splitting to one side, clean it right away — that’s the earliest sign of scale buildup, and catching it early keeps it a five-minute job instead of a replacement.
Should I use a plumber or fix low pressure myself?
Do it yourself for the aerator, shut-off valves, supply lines, spray head, and even the diverter — these are low-risk with basic tools. Call a plumber if the cartridge is seized in a corroded body, if the low pressure affects the whole house (a PRV or main-line issue), or if you find hidden leaks under the sink. Knowing the difference saves you a service call for a five-minute fix.
Will a pull-down sprayer always have lower pressure than a fixed spout?
Not if it’s healthy. A well-maintained pull-down delivers strong flow in both stream and spray modes. When a pull-down feels weaker, it’s the diverter, a kinked internal hose, or a scaled spray face — all fixable. A clean, properly seated pull-down should match the pressure of a fixed spout.
About the author: This guide was written by the arcorarobinet fixtures team, drawing on hands-on faucet installation and repair experience across kitchen and bath fittings. We test flow rates, cartridge durability, and finish quality on the products we sell, and we build our troubleshooting guides around the same front-to-back diagnostic sequence a working plumber uses.
About arcorarobinet: arcorarobinet designs and sells kitchen and bathroom faucets, shower systems, and fixture parts engineered to meet standard U.S. plumbing specifications. Our gooseneck kitchen faucets use solid-brass bodies and ceramic-disc cartridges, are tested to cUPC/NSF-relevant standards for lead-free waterways and flow performance, and are backed by a limited lifetime warranty on the faucet body and finish. Always keep your proof of purchase and model number — it makes both warranty claims and finding the exact replacement cartridge far easier.



您好!Veuillez vous connecter