 ARCORA ROBINETS
How Hard Is a Faucet Handle Replacement Shower Repair — Can You DIY It Yourself?
Vues:0 ClassificationRepair
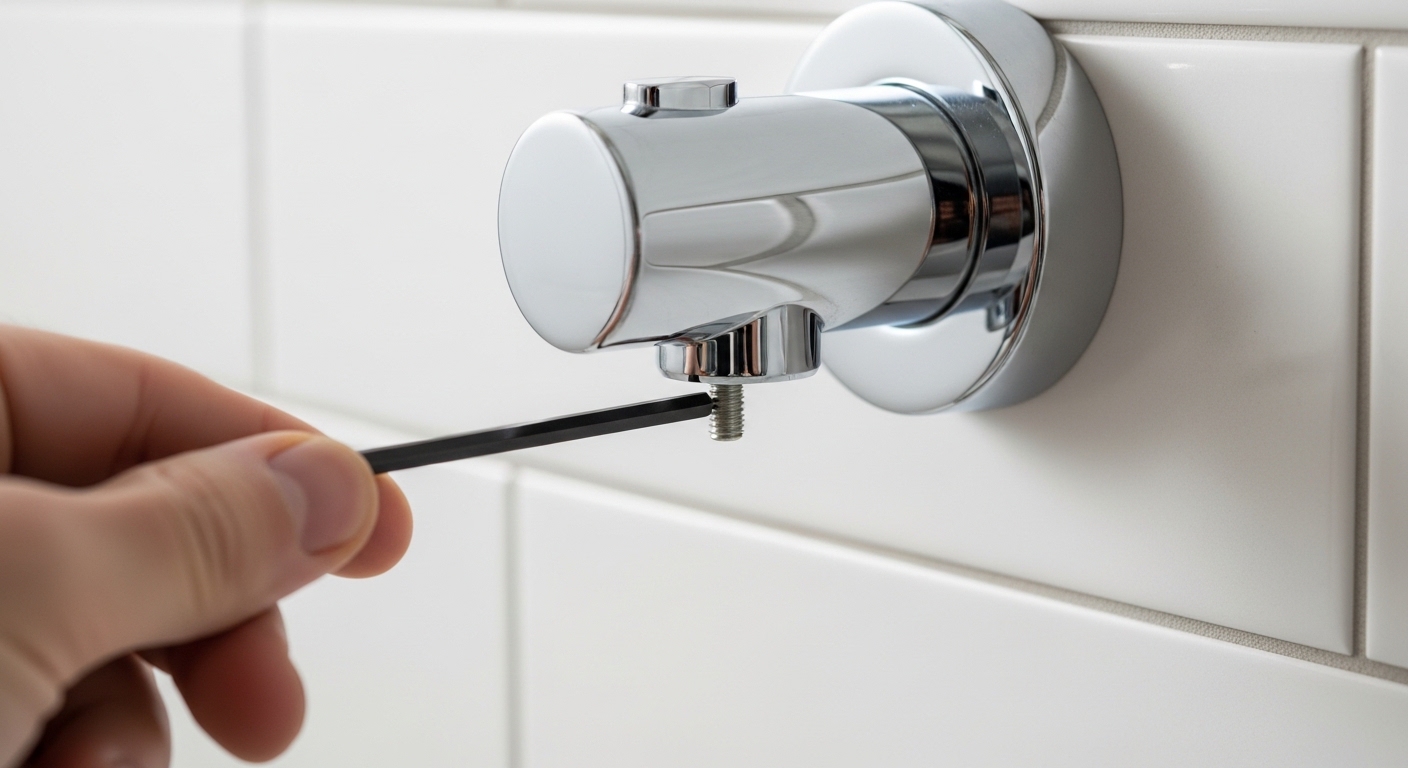
If you’ve been staring at a loose, cracked, or stripped shower handle wondering whether you need to call someone, here’s the honest answer: a faucet handle replacement shower repair is one of the most beginner-friendly plumbing fixes there is. The handle is a mechanical part that sits outside the wall — you’re not touching pressurized pipes or soldering anything. As long as the valve and cartridge behind it are healthy, swapping the handle is mostly a matter of matching the part, backing out one screw, and reversing the steps. Below I’ll walk you through exactly how to tell what kind of handle you have, how to remove it without cracking the tile, which replacement to buy, and when the problem is actually something deeper.
Can you really replace a shower faucet handle yourself, or do you need a plumber?
Yes — in most cases you can do it yourself with basic hand tools and no plumbing experience. The handle is purely the user-facing lever; it clamps onto a splined valve stem or cartridge that stays put in the wall. Replacing it does not open the water lines, so there’s very little that can go catastrophically wrong.
You’d only want to bring in a pro if, once the handle is off, you discover the valve stem is stripped smooth (the handle can’t grip it), the cartridge is cracked, or the whole valve body is leaking behind the wall. Those are different repairs. The handle swap itself is squarely in DIY territory, and honestly it’s a great first plumbing project because the stakes are low and the payoff — a handle that actually turns and holds temperature — is immediate.
- Definitely DIY: loose handle, cracked or corroded handle, stripped set screw, worn finish, handle that spins without turning the water.
- DIY-ish: handle plus cartridge replacement (one step deeper, still doable in an hour).
- Call a pro: water leaking inside the wall, a valve body that won’t shut off, or a stem stripped so smooth no handle will grip it.
How do you know which type of shower handle you actually have?
Look at how many handles control your shower and how the handle attaches — that tells you everything you need to buy the right replacement. There are three common families, and they are not interchangeable.
Single-handle (one lever controls both temperature and flow) is by far the most common in homes built or remodeled after the 1990s. Two-handle setups have separate hot and cold controls, and three-handle setups add a middle diverter for a tub spout. The attachment method is either a small set screw (a hex/Allen screw hidden under or behind the lever) or a screw cap — a decorative button you pop off to reveal a Phillips screw underneath.
| Handle type | How it attaches | Typical brands/valves | Replacement difficulty |
|---|---|---|---|
| Single-lever | Hex set screw under the lever | Moen Posi-Temp, Delta MultiChoice, Kohler Rite-Temp | Easiest (15–25 min) |
| Two-handle (hot/cold) | Screw cap → Phillips screw | Older Delta, Price Pfister, generic compression | Easy (20–30 min per handle) |
| Three-handle (with diverter) | Screw cap or set screw | Vintage/mid-century builds | Moderate (parts can be discontinued) |
| Cross / lever universal | Broach adapter kit | Danco & universal fit kits | Moderate (must match broach) |
The single most important detail is the broach — the number and pattern of splines (teeth) on the valve stem the handle grips. A Moen stem has a different broach than a Delta stem. If you’re buying a brand-matched handle, this is handled automatically. If you’re buying a universal handle kit, it comes with a bag of adapters and you match the one that fits your stem.
What tools and parts do you need for a shower faucet handle replacement?
You need surprisingly little — most people already own everything except the new handle. The whole kit fits in one hand.
- Hex/Allen key set — for the set screw (most single-lever handles use a 7/64″ or 3/32″).
- Phillips and flathead screwdrivers — the flathead pops off decorative caps.
- The replacement handle — brand-matched or a universal kit ($15–$60).
- Plumber’s grease — a dab keeps the new handle sliding on and off easily in the future.
- White vinegar and an old toothbrush — to clean mineral scale off the exposed stem.
- Penetrating oil — only if the old handle is seized by corrosion.
- A towel or rag — to plug the drain so small screws don’t disappear.
Skip the plumber’s tape and pipe wrench for this job — you don’t need them for a handle swap. If you find yourself reaching for a wrench on the water lines, you’ve drifted into a cartridge or valve repair, which is a different (still doable) project.
How do you replace a shower faucet handle step by step?
Here’s the full sequence for a single-lever handle, which covers the majority of modern showers. The whole thing takes about 20–30 minutes at an unhurried pace.
- Shut off the water. For a handle-only swap you technically don’t open the water lines, but shut off the shower’s supply (or the home’s main) anyway — it’s cheap insurance and lets you clean the stem without a surprise spray.
- Plug the drain. Push a rag into the drain so a dropped set screw can’t vanish down the pipe. This one habit saves the most frustration.
- Expose the fastener. On a single-lever handle, look for a small hex set screw at the base or underside of the lever. On a two-handle setup, pry off the decorative cap (often marked H/C) with a flathead to reveal a Phillips screw.
- Back out the screw. Turn it counter-clockwise. If it’s corroded, hit it with penetrating oil and wait 10 minutes. Don’t force a stripped screw — that’s the one thing that turns an easy job hard.
- Pull the handle straight off. It should slide off the stem. If it’s stuck from mineral buildup, wiggle gently and pull straight — never pry against the tile, which cracks finishes.
- Clean the stem. Scrub the exposed splines with vinegar and a toothbrush to remove scale. A clean stem means the new handle seats fully.
- Fit the new handle. For a brand-matched handle, slide it on. For a universal kit, test-fit adapters until one grips the broach snugly with no wobble.
- Tighten and cap. Snug the set screw (don’t overtighten — you can crack a handle), then replace any decorative cap or button.
- Test. Turn the water back on and run the handle through hot, cold, and off. It should feel firm and hold position with no slop.
That’s it. If the new handle turns the water smoothly and holds temperature, you’re done. If the handle turns but water doesn’t respond — or the handle still feels loose after tightening — the issue is behind the handle, which we’ll cover next.
Why is my shower handle loose or spinning even after I replace it?
If a brand-new handle still spins freely or feels loose, the problem isn’t the handle — it’s the valve stem or cartridge underneath. The handle grips a splined stem; if those splines are worn round, no handle can lock onto them, so it slips.
This is common on older Delta, Moen, and Glacier Bay valves where years of turning have rounded off the broach. The fix is to replace the cartridge (which includes a fresh stem), then install your new handle onto it. Cartridge replacement is one step deeper but still a DIY job for most people — you shut off the water, pull a retaining clip, slide the old cartridge out, and push the new one in. If you’re dealing with a Moen valve specifically, our full walkthrough on how to fix a leaking Moen shower faucet covers the Posi-Temp cartridge pull in detail, and it’s the exact same access you use to reach the stem.
A related giveaway that the valve — not the handle — is failing is when the shower keeps dripping or won’t fully shut off. If your tub or shower keeps running warm after the handle is off, that’s a valve/cartridge symptom, not a handle one; we break down those causes and the best replacement valves in our guide on why a bathtub faucet is turned off but hot water still runs.
How much does it cost to replace a shower faucet handle in 2026?
For a DIY handle swap, expect to spend $15–$60 on parts and nothing on labor. If you hire a plumber for the handle alone, you’re looking at roughly $100–$200 total once you add a service-call minimum — which is exactly why this is such a satisfying job to do yourself.
- Universal handle kit: $15–$30 (fits many broaches; great for discontinued models).
- Brand-matched OEM handle: $25–$60 (Moen, Delta, Kohler exact-fit).
- Handle + cartridge combo: $40–$90 if the stem is also worn.
- Plumber labor (if hired): $100–$200 including trip charge.
The math strongly favors DIY here. Even if you buy a $30 handle and a $25 cartridge, you’re at $55 all-in versus paying north of $150 for someone to do a 30-minute job. The only time hiring out makes sense is if the valve body itself is compromised and needs to be cut out and re-soldered.
Should you match the brand or use a universal shower handle?
Match the brand when you can — it guarantees a perfect broach fit, correct depth, and a finish that matches your trim. Go universal only when the original handle is discontinued or you can’t identify the manufacturer.
Brand-matched OEM handles (Moen, Delta, Kohler, Pfister) drop right on because they’re engineered for that exact valve. Universal kits from makers like Danco are lifesavers for older or no-name valves, but they require you to match the correct adapter and sometimes a spacer, and the finish may be a near-match rather than an exact one. If your shower trim is a specific finish — brushed nickel, matte black, oil-rubbed bronze — matching matters for looks. And if you’re refreshing worn finish on nearby fixtures rather than replacing them, a touch-up approach like the one in our guide to oil rubbed bronze faucet touch-up paint can blend a new handle into an aging set.
What mistakes should you avoid during a shower handle replacement?
The three biggest mistakes are prying against the tile, over-tightening the set screw, and buying the wrong broach. Any of them can turn a 20-minute job into an afternoon.
- Don’t pry against tile or the escutcheon. A stuck handle should be wiggled straight off, not levered — cracked tile is a far worse repair than a stuck handle.
- Don’t over-torque the set screw. Metal handles crack and plastic handles strip. Snug is enough.
- Don’t guess the broach. Bring the old handle (or a clear photo of the stem) to the store, or match the adapter carefully with a universal kit.
- Don’t skip cleaning the stem. Scale buildup keeps the new handle from seating and makes it wobble.
- Don’t force a corroded screw. Penetrating oil and patience beat a stripped screw head every time.
One more subtle point: if your handle problem came along with a persistent drip elsewhere, fix the leak at the same time. A dripping shower or bathroom faucet often shares the same worn internals; our overview of why a bathroom faucet leaks and how to stop it pairs well with a handle swap so you’re not opening the wall twice.
FAQ
Can I replace a shower faucet handle without turning off the water?
Technically yes, because a handle swap doesn’t open the water lines — but shut off the shower supply anyway. It costs nothing, prevents an accidental spray if you bump the valve, and lets you clean the stem thoroughly before the new handle goes on.
Are shower faucet handles universal?
No, not truly universal — but universal replacement kits exist. Handles grip a splined stem called a broach, and Moen, Delta, and Kohler all use different broaches. A universal kit includes multiple adapters so you can match your specific stem, which is the workaround when the original handle is discontinued.
Why does my shower handle turn but the water won’t change temperature?
That’s almost always a failed cartridge behind the handle, not the handle itself. The handle is turning the stem, but the cartridge inside the valve isn’t mixing hot and cold properly. Replacing the cartridge — a short step deeper into the same valve — fixes it.
How long does it take to replace a shower handle?
About 20–45 minutes for a first-timer, and closer to 15 once you’ve done it. Most of the time goes to identifying the fastener and cleaning the stem, not the actual swap. Add another 20 minutes if you also replace the cartridge.
What size Allen wrench do I need for a shower handle set screw?
Most single-lever shower handles use a 7/64″ or 3/32″ hex key, though some Delta and Moen models use 1/8″. The safest move is to buy or own a full SAE hex key set — one of them will fit, and you’ll have it for future repairs.
Do I need to replace the escutcheon plate too?
Not usually. The escutcheon (the decorative wall plate behind the handle) is separate and often reusable. Replace it only if it’s cracked, corroded, or if you’re changing finishes and want the plate to match the new handle.
The bottom line, from someone who’s swapped a lot of handles
A shower faucet handle replacement is one of the highest-confidence DIY plumbing wins you can get: low risk, low cost, and a result you feel every single day. Identify your handle type, match the broach, keep the drain plugged, and don’t fight corroded screws — that’s 90% of success. If the handle turns out to be fine and the trouble is behind it, moving on to a cartridge or valve is a natural next step, and there’s a repair guide on our site for nearly every valve family, from Moen Roman tub faucet valves to full tub-spout removals.
About the author: This guide was written by the arcorarobinet fixtures team, drawing on hands-on installation and repair of hundreds of single-lever, two-handle, and diverter shower valves across Moen, Delta, Kohler, and Glacier Bay systems.
Why trust arcorarobinet: arcorarobinet designs and supplies faucets and bathroom fixtures built to standard cartridge and broach specifications, and our replacement handles and cartridges are pressure- and cycle-tested to meet ASME A112.18.1 / CSA B125.1 durability benchmarks. Many of our valve components carry a limited lifetime warranty on the finish and function — so if a handle or cartridge fails under normal use, it’s covered. When you buy a matched handle from us, you’re getting a part verified to seat correctly on its intended valve, not a best-guess universal fit.



您好!Veuillez vous connecter