 ARCORA ROBINETS
Why Is My Outdoor Faucet Leaking From the Stem, and How Do I Stop It?
Vues:0 ClassificationProduct
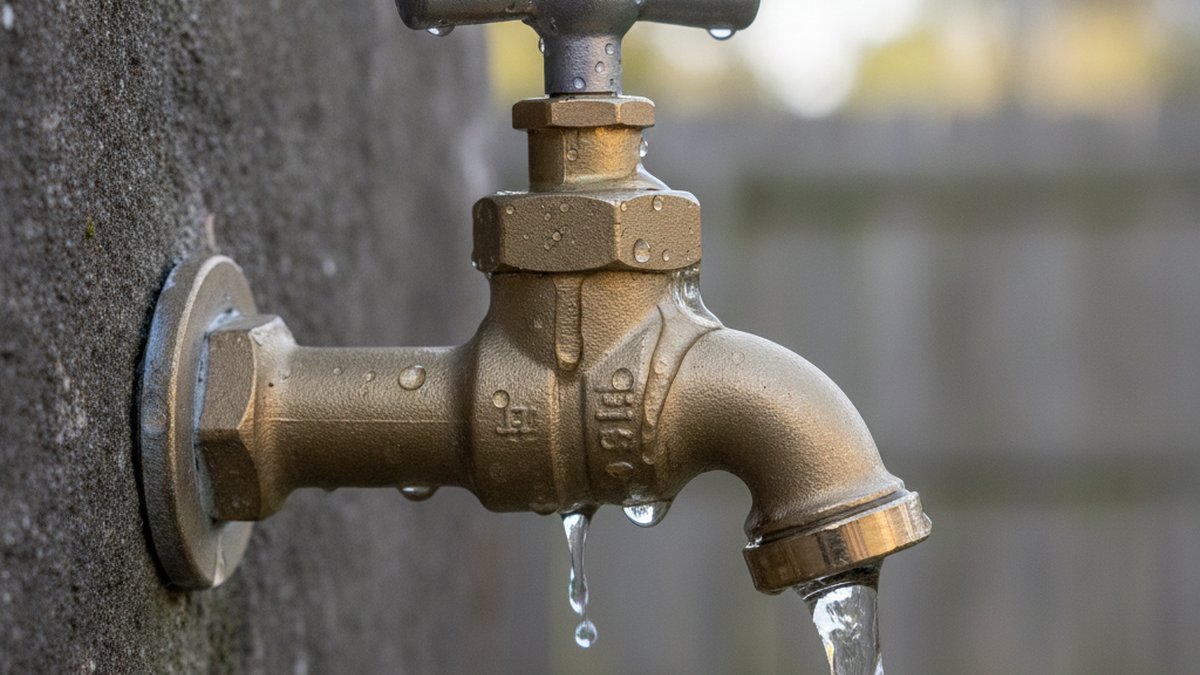
If you have an outdoor faucet leaking from stem — meaning water sprays or dribbles out around the handle every time you turn the water on, not out of the spout — you’re looking at one of the most common and most fixable spigot problems there is. The stem is the shaft the handle turns, and where it passes through the faucet body there’s a seal that keeps water from escaping backward along that shaft. When that seal loosens or wears out, pressurized water finds the path of least resistance and leaks out around the handle. The good news: this is a wear part, it’s cheap, and you rarely have to replace the entire faucet to fix it.
Below I’ll walk through exactly why it happens, how to diagnose whether it’s a loose nut or a dead washer, how to fix each case step by step, and when it’s smarter to stop patching an old hose bibb and just swap the whole thing.
What does « leaking from the stem » actually mean on an outdoor faucet?
It means water is escaping around the handle shaft — not from the spout, not from the wall, not from the hose connection. This is the single clearest diagnostic clue you have. Where the leak comes from tells you which part failed:
- Leaking from the stem/handle when the water is ON: The packing nut is loose or the stem packing washer is worn. This is the classic « outdoor faucet leaking from stem » symptom. Most common by far.
- Dripping from the spout when the faucet is fully OFF: That’s the seat washer (the rubber washer at the bottom of the stem), not the stem seal.
- Leaking from behind the faucet or inside the wall: A cracked pipe or a split frost-free spigot barrel — a bigger job, often from a hard freeze.
- Leaking at the hose threads: Just a bad hose washer or missing gasket where the garden hose screws on.
Because you’ve narrowed it to the stem, you can skip the guesswork. The stem seal on a traditional compression hose bibb is made of one of two things: a soft graphite-impregnated packing washer (a doughnut-shaped washer under the packing nut), or on newer valves, an O-ring that rides in a groove on the stem. Both do the same job and both eventually fail from heat cycling, mineral buildup, and the constant twisting of the handle.
Why is my outdoor faucet leaking around the handle when I turn it on?
Because the packing that seals the turning stem has either loosened or hardened and cracked, so pressurized water pushes past it and out around the handle. When you open the valve, the faucet body fills with water under full house pressure (typically 40–80 psi). The only thing stopping that water from traveling up the stem and out past the handle is that packing seal. When it’s compromised, you get the tell-tale spray or steady weep around the base of the handle exactly when the water is running.
Here are the usual culprits, roughly in order of how often I see them:
- Loose packing nut (60% of cases): The hex nut directly behind the handle backs off a little over years of use. The packing is fine — it just isn’t being compressed anymore. A quarter- to half-turn with a wrench often stops the leak completely.
- Dried, cracked packing washer: Old graphite or fiber packing dries out, shrinks, and crumbles. Tightening the nut buys you a week, then it weeps again. Time to replace the washer.
- Worn stem O-ring: On newer hose bibbs, a small rubber O-ring on the stem gets brittle or nicked. Cheap to swap once the stem is out.
- Pitted or corroded stem: Hard water and brass corrosion can scar the stem itself so no new washer seals against it. Then you replace the stem or the whole faucet.
Worth knowing: this is the same failure mode as an indoor pull-out kitchen faucet leaking at the handle — different faucet, identical principle. A turning shaft needs a seal, and seals wear out. If you understand one, you understand the other.
How do I fix an outdoor faucet leaking from the stem? (step by step)
Start with the free fix — tighten the packing nut — and only tear the valve apart if that doesn’t hold. Here’s the full sequence.
Step 1: Try tightening the packing nut first
You often don’t even need to shut off the water for this. With the faucet running and leaking, put an adjustable wrench or a properly-sized open-end wrench on the packing nut (the hex nut right behind the handle) and turn it clockwise a quarter-turn. Watch the leak. If it slows, give it another eighth-turn. Stop as soon as the leak stops — over-tightening makes the handle stiff and crushes the packing prematurely. If the leak stops and stays stopped, you’re done. If it comes back within days, move to Step 2.
Step 2: Shut off the water and open the faucet
Find the shutoff for that line. Many outdoor spigots have a dedicated indoor shutoff valve on the supply pipe just inside the wall (sometimes with a small bleeder cap). If not, shut off the main. Then open the outdoor faucet fully to drain the line and relieve pressure. Confirm the water is actually off before you take anything apart — this matters.
Step 3: Remove the handle and back out the stem
Unscrew the handle screw and pull the handle off. Then loosen the packing nut fully and unthread it. With the packing nut off, turn the stem counter-clockwise (as if opening the faucet) and it should thread all the way out of the body. Pull the whole stem assembly out so you can see the packing washer, O-ring, and the seat washer at the bottom.
Step 4: Replace the packing and/or O-ring
Inspect the packing washer under the nut. If it’s flattened, cracked, or crumbly, replace it. You have three options at the hardware store, all cheap:
- Pre-formed packing washer: Match the diameter to your stem. Slip it on and reassemble.
- Graphite string packing: Wrap it around the stem a few turns — the universal fix that fits almost any old spigot when you can’t find the exact washer.
- Replacement O-ring: If your stem uses an O-ring, roll the old one off and fit a new one of the same size, with a dab of plumber’s silicone grease.
While you’re in there, look at the rubber seat washer at the bottom of the stem too. If it’s chewed up, replace it now — that prevents a future spout drip and saves you a second teardown.
Step 5: Reassemble, then test
Thread the stem back in, hand-tight then snug with the wrench. Reinstall the packing nut — snug, not gorilla-tight. Put the handle back on. Turn the water back on slowly and open the faucet. Check for leaks around the stem. A properly seated new washer should give you a dry handle and a smooth-turning valve.
If your stem itself is pitted or the threads inside the body are corroded, no washer will save it — that’s when a full valve or faucet swap makes sense. Our companion guide on outdoor faucet valve replacement walks through when to rebuild versus replace the whole spigot, including frost-free models.
Loose packing nut vs. worn washer vs. bad O-ring: how do I tell them apart?
Quick answer: tighten the nut first — if the leak stops for good, it was a loose nut; if it returns within days, the packing washer is worn; if your faucet is newer (post-2000, smoother modern styling), it’s likely the O-ring. Here’s a side-by-side to make the call fast:
| Symptom / clue | Likely cause | Fix | Cost & time |
|---|---|---|---|
| Leak stops permanently after tightening nut | Loose packing nut | Just tighten ¼ turn | $0, 2 min |
| Leak returns days after tightening; nut already snug | Dried/cracked packing washer | Replace packing washer or add graphite string | $3–$6, 20 min |
| Newer faucet, smooth handle, leak around stem | Worn stem O-ring | Replace O-ring, add silicone grease | $2–$5, 20 min |
| New washer still leaks; handle wobbles | Pitted/corroded stem | Replace stem or whole faucet | $10–$40, 30–60 min |
| Leak from wall/behind faucet, not stem | Cracked barrel / frozen pipe | Replace frost-free spigot | $20–$60, 1–2 hr |
The pattern to remember: tighten → replace washer → replace stem → replace faucet. Work up that ladder and you’ll rarely overspend or over-work a simple leak.
What tools and parts do I need, and what will this cost me?
You need almost nothing — this is one of the cheapest plumbing repairs in the house. Total out-of-pocket for a stem-leak fix is usually under $10. Here’s the full kit:
- Adjustable wrench or a set of open-end wrenches (for the packing nut and stem)
- Screwdriver (flat or Phillips, for the handle screw)
- Replacement packing washer, graphite string packing, or O-ring assortment — match your stem
- Plumber’s silicone grease (a few dollars, makes O-rings last)
- Optional: a new seat washer while you’re in there
- Rag and a small bucket for drips
If you’d rather not chase individual washers, buy a stem/washer repair kit or a complete replacement stem for a couple of dollars more — it comes with fresh packing, O-ring, and seat washer all matched. And if your faucet threads onto the supply line rather than sweating onto copper, make sure you understand your connection type before you buy a full replacement; our guide on faucet supply line thread types helps you avoid buying the wrong fitting and cross-threading a new leak into existence.
Should I just replace the whole outdoor faucet instead of fixing the stem?
Replace the whole faucet if the stem is corroded, the body is cracked from freezing, or you’re still running an old non-frost-free spigot in a cold climate — otherwise, rebuild it. A packing washer or O-ring swap is the right call 80% of the time and costs a fraction of a new faucet. But there are clear cases where replacement wins:
- The stem is visibly pitted or the brass is green with corrosion — no seal holds against a scarred stem.
- You’ve had freeze damage — a split barrel behind the wall won’t stop leaking no matter what you do to the handle. Upgrade to a frost-free (freeze-proof) spigot with a built-in vacuum breaker.
- The faucet is decades old and parts are hard to match — sometimes a $20 new hose bibb beats an hour hunting for an obsolete washer.
- You want an anti-siphon / vacuum breaker for backflow protection, which many modern codes require on outdoor spigots.
The same « fix the seal vs. replace the fixture » logic applies all over the house — it’s exactly the judgment call you make with a dripping tub spout indoors. Small worn seal? Rebuild. Cracked or corroded body? Replace. Match the effort to the damage.
How do I stop my outdoor faucet from leaking again next season?
Do three things: don’t over-tighten the handle, disconnect the hose before winter, and drain the spigot before the first freeze. Most repeat stem leaks trace back to two habits — cranking the handle shut with all your strength (which shreds the seat and packing) and leaving a hose attached through a freeze (which traps water in the barrel and cracks it). A few minutes of prevention saves you the whole repair next spring:
- Close gently. Snug is off. White-knuckling the handle destroys washers faster than water pressure ever will.
- Remove the garden hose every fall. A connected hose holds water in the faucet where it freezes and expands.
- Shut the indoor supply valve and drain the line before winter if you don’t have a frost-free spigot.
- Add a dab of silicone grease to the O-ring or stem threads during any repair so it turns smoothly and seals longer.
- Insulate the faucet with a foam cover in freezing climates.
FAQ
Can I fix an outdoor faucet leaking from the stem without turning off the water?
Sometimes — if the fix is just tightening the packing nut a quarter-turn, you can do that with the water on and watch the leak stop. But the moment you need to remove the stem to replace a washer or O-ring, you must shut off the water first, or you’ll get a face full of pressurized water. When in doubt, shut it off; it takes two minutes.
What is the packing nut on an outdoor faucet?
The packing nut is the hexagonal nut located directly behind the handle, threaded onto the faucet body. It compresses the packing washer (or graphite packing) around the stem to seal it. When you have a stem leak, this nut and the packing under it are almost always the parts involved — tighten it or replace what’s beneath it.
How much does it cost to fix an outdoor faucet leaking from the stem?
If you DIY, usually $3–$15 in parts — a packing washer, O-ring, or a small repair kit — plus about 20 minutes. If you replace the entire hose bibb, budget $10–$40 for a quality frost-free spigot. Hiring a plumber for a simple stem leak typically runs $75–$150 in labor, which is why this is a great first DIY plumbing job.
Why does my outdoor faucet leak from the handle only when it’s turned on?
Because water is only under pressure inside the faucet body when the valve is open. With the faucet off, the seat washer blocks water before it reaches the stem, so there’s nothing to leak. When you open the valve, the body fills with pressurized water, and a worn stem seal lets it escape around the handle. That on-only pattern is the signature of a stem/packing problem, not a spout drip.
Is graphite string packing better than a packing washer?
Graphite string is more versatile — you wrap it around the stem to fit almost any older faucet, which is handy when you can’t find the exact pre-formed washer. A molded packing washer is quicker and cleaner if you can match the size. Both seal well. For a modern faucet with an O-ring groove, use a correctly-sized O-ring with silicone grease instead of either.
Can a leaking outdoor faucet stem cause water damage?
A slow stem weep usually just wastes water and drips down the wall, but if the faucet is set into siding or near a foundation, chronic moisture can rot trim, feed mildew, or seep behind the wall — and if the leak is actually a cracked frost-free barrel, water can run inside the wall unseen. Don’t let a stem leak sit for months; it’s a five-minute fix that prevents a much bigger repair.
About the author: This guide was written by the arcorarobinet fixtures team — plumbing product specialists who design, pressure-test, and field-service faucets, spigots, and shower valves every day. We’ve rebuilt and replaced thousands of hose bibbs, and every repair sequence here reflects what actually works on real faucets, not theory.
Why trust arcorarobinet: arcorarobinet manufactures and supplies bathroom and kitchen fixtures built to standard plumbing specifications, and our valve components are cycle-tested for durability and backed by a manufacturer’s warranty. When we recommend a repair-versus-replace threshold, it’s based on the same testing and standards we hold our own products to — including backflow-prevention (vacuum breaker) requirements for outdoor spigots.



您好!Veuillez vous connecter