 ARCORA ROBINETS
What Is the Best Bar Faucet Wall Mount Setup, and How Do You Choose One That Actually Fits?
Vues:0 ClassificationProduct
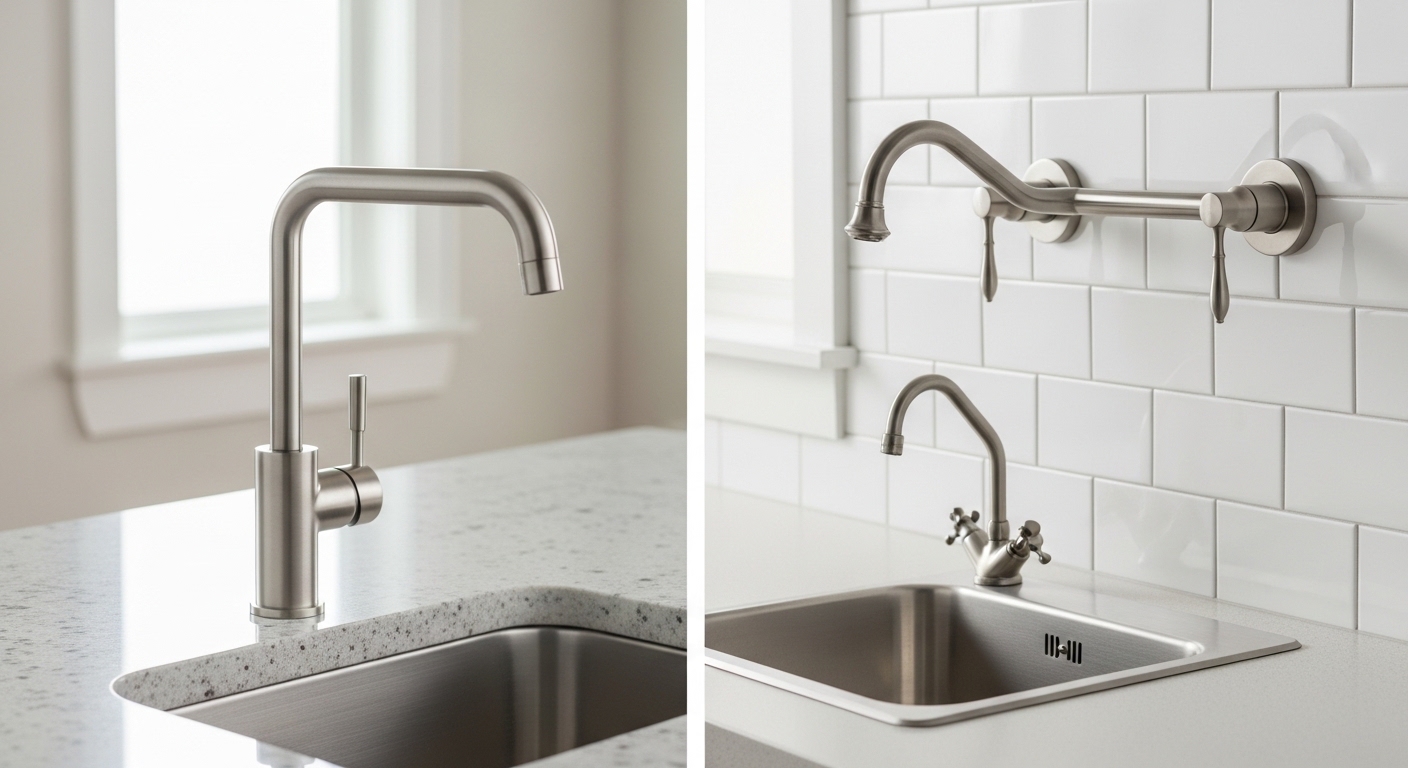
If you’re outfitting a wet bar, prep station, or a small secondary sink and you want the cleanest possible look, a bar faucet wall mount is one of the smartest picks you can make. It clears the deck around the basin, eliminates the crud-collecting gap where a deck-mounted faucet meets the counter, and gives a bar area that upscale, built-in feel. But wall-mounted models are less forgiving than drop-in faucets: get the rough-in wrong and you’re opening drywall. This guide walks you through exactly how to choose, spec, and buy the right one — in plain language, from people who sell and test these every day.
What exactly is a bar faucet wall mount, and how is it different from a regular bar faucet?
A bar faucet wall mount is a small-format faucet whose valve and spout are plumbed into the wall above and behind the sink, rather than through holes drilled in the countertop or sink deck. The water lines and the mounting hardware live inside the wall cavity; only the spout, handle(s), and escutcheon (the decorative wall plate) are visible.
The practical difference comes down to three things: where the plumbing lives, how much counter you keep, and how hard it is to install. A standard deck-mounted bar faucet drops into a 1-3/8″ hole in the counter and connects to supply lines underneath — easy, DIY-friendly, and forgiving. A wall-mount version requires the rough-in valve to be set inside the wall at the correct height and spacing before the wall is closed up and tiled. That’s more work up front, but the payoff is a spotless counter and a genuinely custom look.
Bar and prep sinks are smaller than a main kitchen sink, so bar faucets are scaled down too — shorter spouts, lower profiles, tighter reach. That’s important, because a full-size kitchen faucet mounted on the wall would overshoot a 15-inch bar basin entirely. If you’re still deciding between wall-mount and deck-mount, our deeper dive on the best bar sink faucet one-hole setup covers the deck-mounted alternative in detail.
Should you get a wall-mounted bar faucet or a deck-mounted one?
Get a wall-mounted bar faucet if you’re building or remodeling and can access the wall before it’s finished; get a deck-mounted one if the sink is already installed or you want a simple weekend swap. That’s the honest short answer — the « better » choice depends almost entirely on timing and access, not on which one performs better.
Here’s how the two stack up on the factors that actually matter at a bar:
| Factor | Wall Mount Bar Faucet | Deck Mount Bar Faucet |
|---|---|---|
| Counter space | Maximum — nothing behind the sink | Reduced — faucet base occupies the deck |
| Cleanup around base | Easy — no deck seam to trap gunk | Grime collects where base meets counter |
| Install difficulty | Higher — needs in-wall rough-in | Low — DIY-friendly drop-in |
| Best time to install | New build / open-wall remodel | Any time, including existing sinks |
| Freeze risk (exterior wall) | Higher — lines sit in wall cavity | Lower — lines stay in cabinet |
| Repair access | Through the wall or escutcheon | Under the sink |
One point people overlook: if the bar sink sits against an exterior wall in a cold climate, running supply lines inside that wall for a wall-mount faucet raises the freeze risk. In that case, either insulate the cavity aggressively or stick with a deck-mounted model. If you’re torn between one lever and two, our guide on one vs. two handle faucets applies to bar faucets too — single-lever wins for tight prep spaces, two-handle wins for a classic bar look.
What size and rough-in do you need for a wall mount bar faucet?
For most bar sinks, you want a wall-mount faucet with a spout reach of 4 to 6 inches and a rough-in valve set 4″ or 8″ on-center for two-handle models (single-handle models use one valve body). The spout should land with its aerator roughly over the center of the drain — measure your basin before you buy.
Let’s break the measurements down so nothing surprises you at install:
- Spout reach: the horizontal distance the water arcs out from the wall. For a 12–15″ bar basin, 4–6″ of reach centers the stream nicely. Too much reach and water hits the front lip; too little and it splashes the back.
- Spout height above the rim: a bar faucet’s spout typically clears the sink rim by 4–8″. Enough to slip a pint glass or a small pitcher under, but not so tall it splashes in a shallow basin.
- Valve spacing (center-to-center): two-handle widespread wall mounts commonly use 8″ centers; some compact models use 4″ centers. Single-handle models use one cartridge body. Match this to your rough-in valve exactly.
- Rough-in depth: the valve has to sit at the right depth from the finished wall surface so the escutcheon seats flush against the tile. Read the manufacturer’s spec sheet — this is the number people most often miss.
Because a wall-mount faucet is buried in the wall, the finish and construction quality matter more than usual — you can’t easily rip it out and start over. It’s worth checking the plumbing certification before you commit; our explainer on the bathroom faucet UPC and cUPC marking shows why that little stamp tells you the faucet is lead-safe and code-compliant for potable water.
Do wall mount bar faucets come in hot and cold, or cold only?
Both exist, so read the listing carefully. A true bar/prep faucet is a mixer with both hot and cold supply — you’ll use warm water for rinsing glasses and prepping. Some very cheap « bar » spouts are cold-only (basically a single-temperature pot-filler style), which is fine for a coffee or ice station but frustrating at a real wet bar. If you want hot water, confirm the model has two supply inlets or a mixing cartridge before buying.
How do you install a wall mount bar faucet without regretting it later?
Install a wall-mount bar faucet by setting the rough-in valve into the open wall at the correct height and spacing, pressure-testing the connections before you close the wall, then mounting the escutcheon, spout, and handle after the tile is finished. The single biggest rule: never close the wall until you’ve tested for leaks under pressure.
Here’s the realistic sequence, whether you DIY or hire out:
- Confirm the spec sheet first. Note valve spacing, rough-in depth, and finished-wall thickness (drywall + backer + tile). Dry-fit everything.
- Set the valve height. Measure up from the finished sink rim so the spout will clear your tallest common glass or pitcher — usually 8–12″ above the rim to the spout, but confirm against your basin.
- Secure the valve body to blocking (a wood brace between studs) so it can’t shift when handles are turned. Loose valves are the number-one wall-mount failure.
- Connect and pressure-test. Run supply lines, open the water, and check every joint for weeping. Fix leaks now, while the wall is open — not after tile.
- Close, tile, and finish. Then install the escutcheon, spout, and handle(s), seal the escutcheon edge with a thin bead of silicone, and test again.
If you’ve never soldered or sweated a joint, this is a job where a plumber earns their fee — the cost of a leak inside a finished wall dwarfs the install price. That said, the finishing stage (escutcheon and handles) is very DIY-friendly. The mechanical logic is close to what we cover in our walkthrough on installing a shower faucet set, since both are wall-mounted, valve-in-wall systems.
Which finish holds up best for a bar faucet wall mount?
For a bar area, brushed/stainless and matte black hide water spots and fingerprints best, while chrome gives the brightest, easiest-to-clean shine at the lowest price. Because a bar faucet gets handled with wet, often sticky hands (think citrus, syrups, wine), fingerprint resistance genuinely matters here.
A quick rundown of the common options for a wall-mount bar faucet:
- Polished chrome: cheapest, brightest, wipes clean instantly — but shows water spots. A reliable default. If you’re weighing it against pricier finishes, our take on whether a chrome faucet is good lays out the trade-offs.
- Brushed nickel / stainless: warm, soft sheen that hides spots and prints — ideal for a busy bar.
- Matte black: modern, high-contrast against light tile; hides fingerprints well but shows dried mineral spots in hard-water areas.
- Brushed gold / champagne bronze: the trend finish for 2026 bars; warm and upscale, forgiving on prints.
- Oil-rubbed bronze: traditional, dark, great for classic wet bars.
Whatever finish you choose, make sure it’s a genuine PVD (physical vapor deposition) coating, not a cheap electroplate — PVD resists scratching and tarnish far longer, which is exactly what you want on a faucet buried in a finished wall you don’t want to disturb.
Is a wall mount bar faucet worth it for a small home bar under $250?
Yes — for most home bars, a solid wall-mount bar faucet lands in the $120–$250 range and is absolutely worth it if you’re already opening the wall. The value isn’t just the faucet; it’s the reclaimed counter space and the clean, built-in look that makes a small bar feel intentional and finished rather than tacked-on.
Where it stops being worth it: if the sink is already installed against a finished wall, retrofitting a wall-mount faucet means demolition, and the labor can easily exceed the faucet’s price. In that case a quality deck-mounted bar faucet gives you 90% of the look for a fraction of the hassle. Match the decision to your timeline — new build or gut remodel favors wall mount; a quick upgrade favors deck mount.
How arcorarobinet tests and backs its bar faucets
Author note: This guide was written by the arcorarobinet product team, who spec, sell, and pressure-test bar and prep faucets year-round and field installer questions from customers across North America. We’ve handled the exact rough-in headaches described above, which is why we hammer on measuring twice before you open a wall.
Brand credibility: arcorarobinet manufactures and curates faucets built to cUPC/NSF-61 standards for lead-free potable water, with ceramic-disc cartridges rated to 500,000+ open/close cycles and PVD finishes tested against salt-spray corrosion. Every wall-mount bar faucet we sell ships with a documented rough-in spec sheet and is backed by a limited lifetime warranty on the finish and cartridge, so a wall-buried valve isn’t a gamble. Always keep your spec sheet and proof of purchase — warranty claims on in-wall valves go much smoother with them.
FAQ
Can you convert a deck-mounted bar sink to a wall mount faucet?
Only if you’re willing to open the wall. Converting means running new supply lines inside the wall, setting a rough-in valve, patching and re-tiling, and capping the old deck holes in the counter or sink. It’s doable during a remodel but rarely worth the demolition on a finished, working setup — a deck-mount replacement is far simpler.
What height should a wall mount bar faucet be installed above the sink?
Aim for the spout to clear the sink rim by about 8–12 inches, adjusted so your tallest regular glass or small pitcher fits underneath without splashing. Measure your actual glassware and basin depth first, then set the valve height from the finished rim — not from the rough floor or subcounter.
Do wall mount bar faucets leak more than deck-mounted ones?
No — a properly installed, pressure-tested wall-mount faucet is just as reliable as a deck-mount. The catch is that a leak inside a finished wall is harder to spot and costlier to fix, which is why pressure-testing before you close the wall is non-negotiable. The faucet itself doesn’t leak more; the consequences of skipping the test are just higher.
Are wall mount bar faucets hard to repair once the wall is tiled?
Most routine repairs — replacing the cartridge, swapping the aerator, or fixing a handle — are done from the front through the escutcheon, no wall demolition needed. That’s why we recommend faucets with serviceable, standardized ceramic-disc cartridges. You’d only open the wall for a rare failure at the valve body or supply connection.
What’s the difference between a bar faucet and a kitchen faucet on the wall?
Scale and reach. A bar/prep faucet is smaller — shorter spout, lower profile, tighter reach — sized for a 12–15″ prep basin, while a wall-mount kitchen faucet is larger with a longer reach for a full sink. Putting a kitchen faucet over a small bar sink usually overshoots the basin and splashes the counter.
Do I need a plumber to install a wall mount bar faucet?
You can DIY the finishing stage (escutcheon, spout, handles) confidently, but the in-wall rough-in and supply connections are best left to a plumber unless you’re experienced with pressurized joints. The stakes — a leak sealed inside a finished, tiled wall — are high enough that professional install is cheap insurance for the valve stage.



您好!Veuillez vous connecter